Showing posts with label Domino Server Configs. Show all posts

Monday, November 5, 2012

How to Customize iNotes Login Screen (Lotus Web Mail - Login Page)

Today, I'm going to post how to insert company logo and company stamp/name picture on lotus iNotes (Lotus notes WebMail) login page.

Before you begin you must enable the web mail in the Primary Domino Server (or a Fresh Domino Server for WebMail only) . Once you have done that in the domino server, you will see two nsf files :
(Filename can be different as per your choice)

1. iNotes.nsf  (See below screen-shot)


2. domcfg.nsf (See below screen-shot)


When you launch the IE or Firefox on http://dominohub.test.net , initially you'll see below screen. This is the one we are going to replace with our company logo & name.


Steps to Do :

Step-1: (Start Domino Designer Client with Proper Credentials)


Step-2: (Get a copy of "Domcfg.nsf" and Open with Domino Designer)


Step-3:


Step-4:


Step-5:


Step-6:


Step-7:


Step-8:

Step-9:


Step-10:


Step-11:


Now, Launch the iNotes page in a browser,

Hope this article would help you to improve and innovate more ways in customizing the iNotes.

  Additional Setting :

 Cause : The design task has most likely run and replaced your changes with the template  version.

 Solution :


Tuesday, September 20, 2011

How to add a Domino Policy (Explicit)


Here we are going to create a policy where group of users getting "iNotes_Lite Mode" automatically. You may add or remove users from the group any time.


How to add "iNotes Lite mode" using a Policy

Before starting this create a group called "iNotes-Lite-users"

1. Create a Policy call "iNotes-Lite4All" and set Policy type to "Explicit"


2. Go down and select "New.." under Mail Setting Type


3. Under Basics , enter name as "iNotes-Lite" and the Description


4. Go to Lotus iNotes Tab and under Basics select "User UI mode" you want and Set value and prevent changes as user cannot see or change this option on their own


5. Go down and set "Display options" as you want and do Save & Close


6. Go to "iNotes-Lite4All > Policy Assignment" and assign the group you want , then Save & Close


7. Enter "tell adminp update policy" on the domino console

8. This is how you will see at the end of policy creation


Once you are done for all above steps, perform below commands after adding any of users in the domino data directory.

tell adminp update group
tell adminp process mailpolicy


Once you do like this , you are done.Enjoy !!!!


Note : When you perform "tell adminp process mailpolicy" , you will see errors on items 'DefaultAppAssoc' and 'DefaultAppDom'.
Resolve those using below Tech-note
 "https://www-304.ibm.com/support/docview.wss?uid=swg21507786"

Alternative Method

1. Add this line to Notes.ini file "iNotes_WA_DefaultUI=dwa_lite "
2. Restart HTTP task to effect the feature.


Note : This will effect to all users in domino data directory
(Tech-note : https://www-304.ibm.com/support/docview.wss?uid=swg21290899 )

How Create a User, only to Register Users in Domino Server

This user can only register users in a particular domino server and he is not allowed to see or change the user's mail databases.Therefore will call this user "RegAdmin"

Steps to be followed:
  • Create "RegAdmin" user in the Domino Data Directory with below Access
    • User Type : Person
    • Access : Editor
  • Go to "RegAdmin" user's database and set ACLs exactly the same here in the screen


  • Now set ACLs to this user on Certlog.nsf as below


  • Set Domino Data Directory Access (Names.nsf) as below


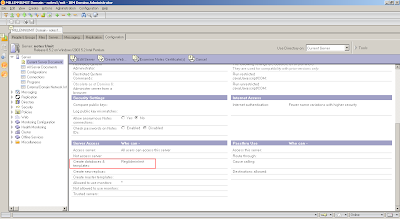
  • Change the current server document as below


  • Now you are done.You have created the User Registrar Person successfully.

    Before you create new users using this RegAdmin id, please change your user registration policy or add "Mail File Manager" parameter manually. (See the screen below)


    Many of Domino Administrators want to limit ACLs/ Security settings in the Domino Server.Above article is one of such administration task which is very useful. 


    Monday, September 19, 2011

    How to Recover Missing Lotus Notes id File

    Please follow the steps below.

    Prerequisites :
    • If user has set security encryption on mail database, recovered id file may not be opened the old mail database as well as encrypted emails
    • At the user registration if you are adding user to the groups, please follow the same for below as well
    Steps to Follow:
    1. Login to Admin client as domino administrator
    2. Go to People tab and select the particular user
    3. Open the person document and take a screen shot where you can see all attributes
    4. Do not forget to save it
    5. Now, Select the user and simple hit DELETE key in the key-board (Do not use other delete options)
    6. Now click on Register user
    7. Set the mail system to "None" (This will prevent mailfile creation)
    8. Perform all the steps that you do for registering a user under correct OU exactly same as the above user
    9. Now register the user (Make sure to give accessible local path to the new id file is being created)
    10. Hence, search the user and go to the person document
    11. Click on Edit and enter the details as per the previous screenshot you've taken
    12. Save & Close
    You are done....Enjoy !!!

    Set ACLs to Extract notes ids from Domino ID Vault

    Follow the steps below.

    • Logging in to Domino Admin Client
    • Go to files tab and select IBM_ID_VAULT
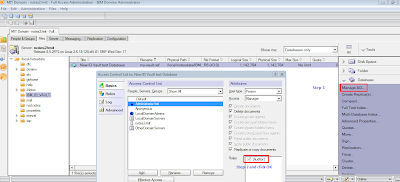
    • Right click and go to Manage Database Access Controls
    • Click on Administrator and add Role "Auditor"
    You are done now, refer below screen shot for more details.

    Set ACLs to Extract notes ids from ID Vault

    Monday, June 13, 2011

    How to Create Resource Reservation Database in Domino 8.5.2

    Here are the basic steps

    Creating the Resource Reservations database
    • The Resource Reservations database consists of three documents: Site Profile, Resource, and Reservation.
    • A Site Profile document identifies the site where particular resources are located.
    •  Template Name : RESRC8.NTF
     Please see screen shots # 1 to 4


    Creating the database ACL for the Resource Reservations database

    This will Assign the CreateResource role to anyone who needs to create a site or a resource.
    Required Role Name : CreateResource role

    Here we are giving authorization to Administrator to create Resources and Site Profile documents
    in Resource and Reservation database

     Please see screen shots # 5 to 6


    Setting up Site Profile and Resource documents
     
    Step-1 : Complete All steps upto now.
    Step-2 : Create a New Site Profile  (Head-Quarters)
    Step-3 : Create a New Resource document

     Please see screen shots # 7 to 13


    How to Use  it :

    Go to More > Preferences.Calendar & Todo/Rooms and Resources tab
    Change your Preferred site to "
    Head-Quarters"


    Start Reserving Rooms and Resources :)
    (See Screen 14 )